Team Leader Tasks before getting started

Contents
Introduction
This page describes tasks done by the Team Leader before STEP standards developers can start work.
Prerequists
This assumes that:
- STEPlib Git repository has already been forked and branched as described in Git Team Leader Documentation
- STEPlib Git repository has already been cloned as described in Git Developer Documentation.
- The MagicDraw environment has been set up, see Setting up with MagicDraw 18.4 for use with STEPlib.
Create a new Application Protocol (AP)
This explains how to add a new Application Protocol [AP] to STEPlib.
Figure 22 below shows the model structure of an AP.
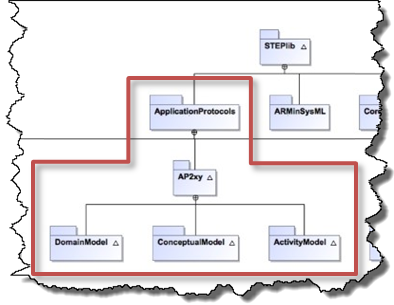
Figure 22 STEPLIB Model Structure – Package diagram
The following video shows the steps (1-7) in this task.
The steps in the task are as follows:
Open the ApplicationProtocols project (see Open readonly sub models)
M-R on the ApplicationProtocols in the tree and select Create Element and then select model
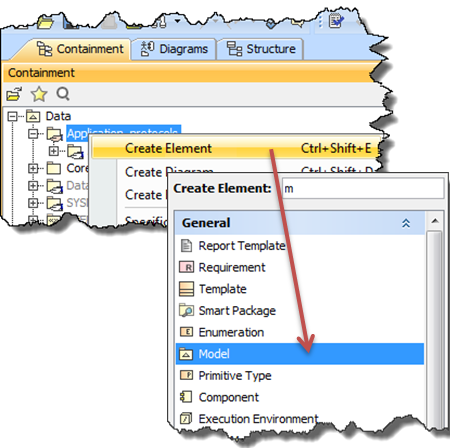
Figure 23 Create Element > Model
Rename the new model to the name of the new AP, e.g. AP243
Add a comment with the full name of the AP
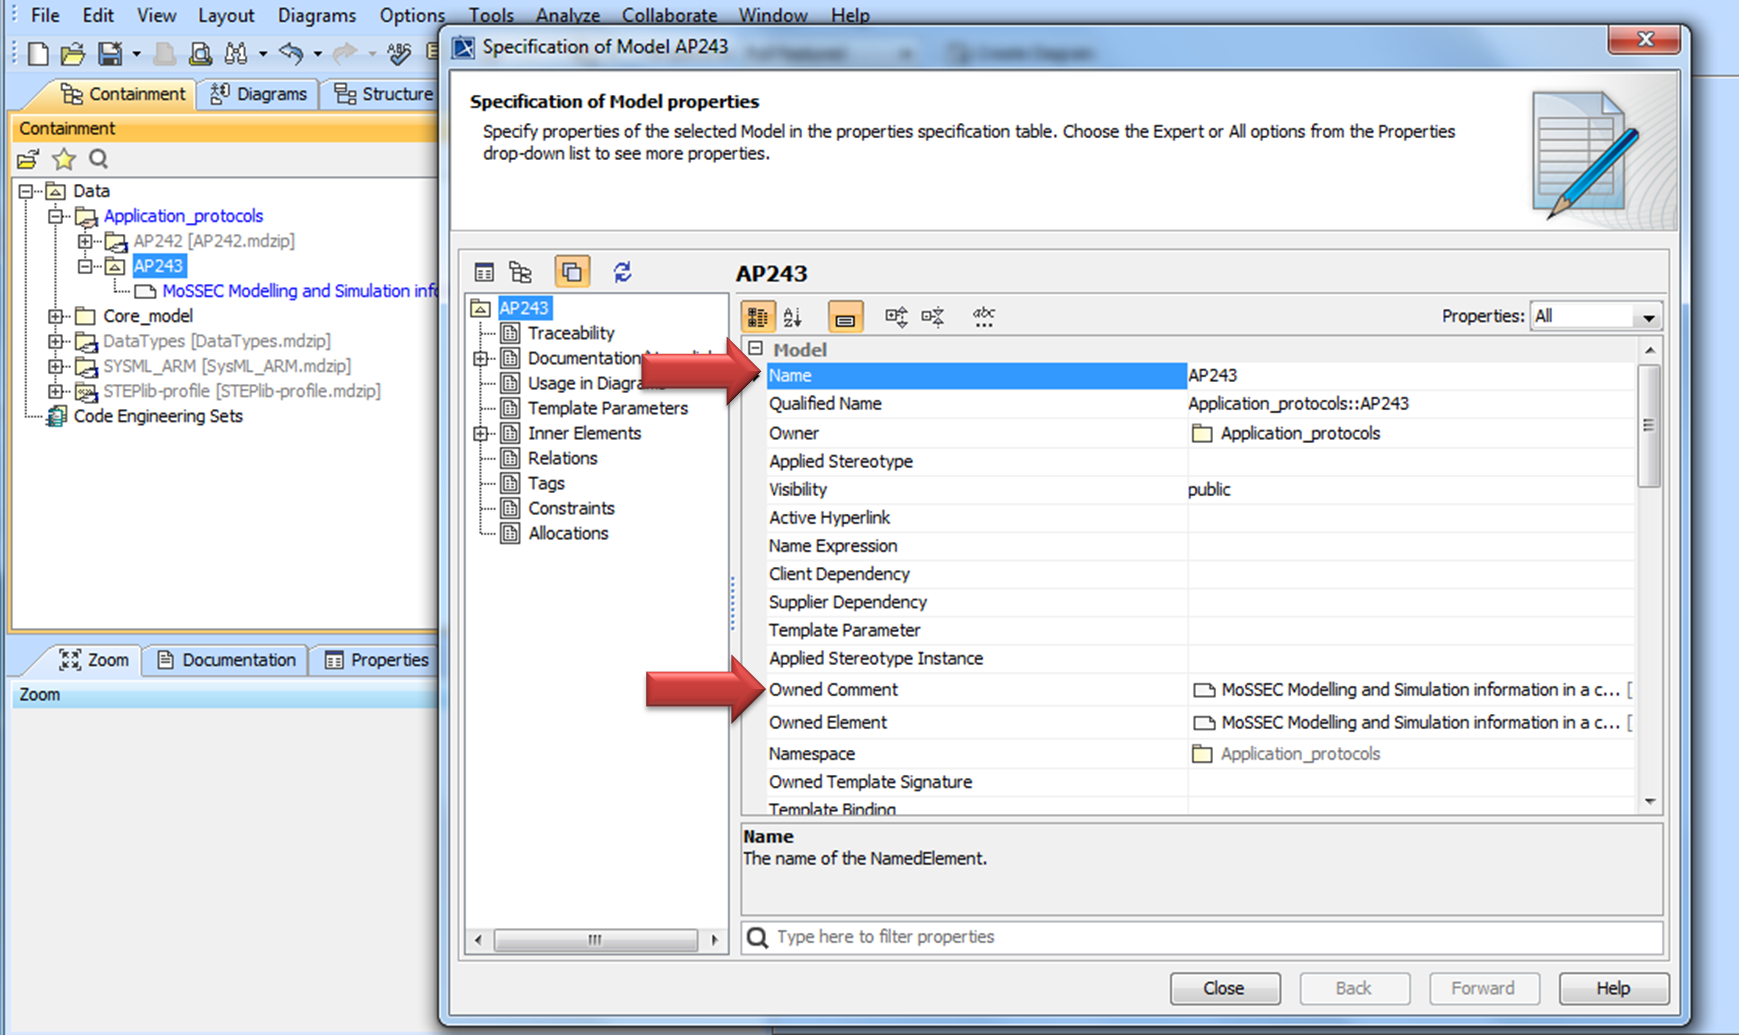
Figure 24 Rename and add comment
- Export the model to a separate project
Select Project Usages > Export Package to New Project
The project should already be selected in the “Export Package to New Project” dialog, so select OK
Yes to “Show Auxillary resources”
Yes to “Check Dependencies”
- In the “Save Dialog”
- make a new folder for the AP in the Application_Protocols folder
- make a new dvlp folder in the the new AP folder
- the default file name should be the name of the AP
- the file type should be mdzip (default)
- save
In the “Use Path Variables” dialog, the STEPlib environment variable is selected (default). select Use Selected
On completion a new mdzip file is created in the dvlp folder, and the ApplicationProtocols mdzip has been updated.
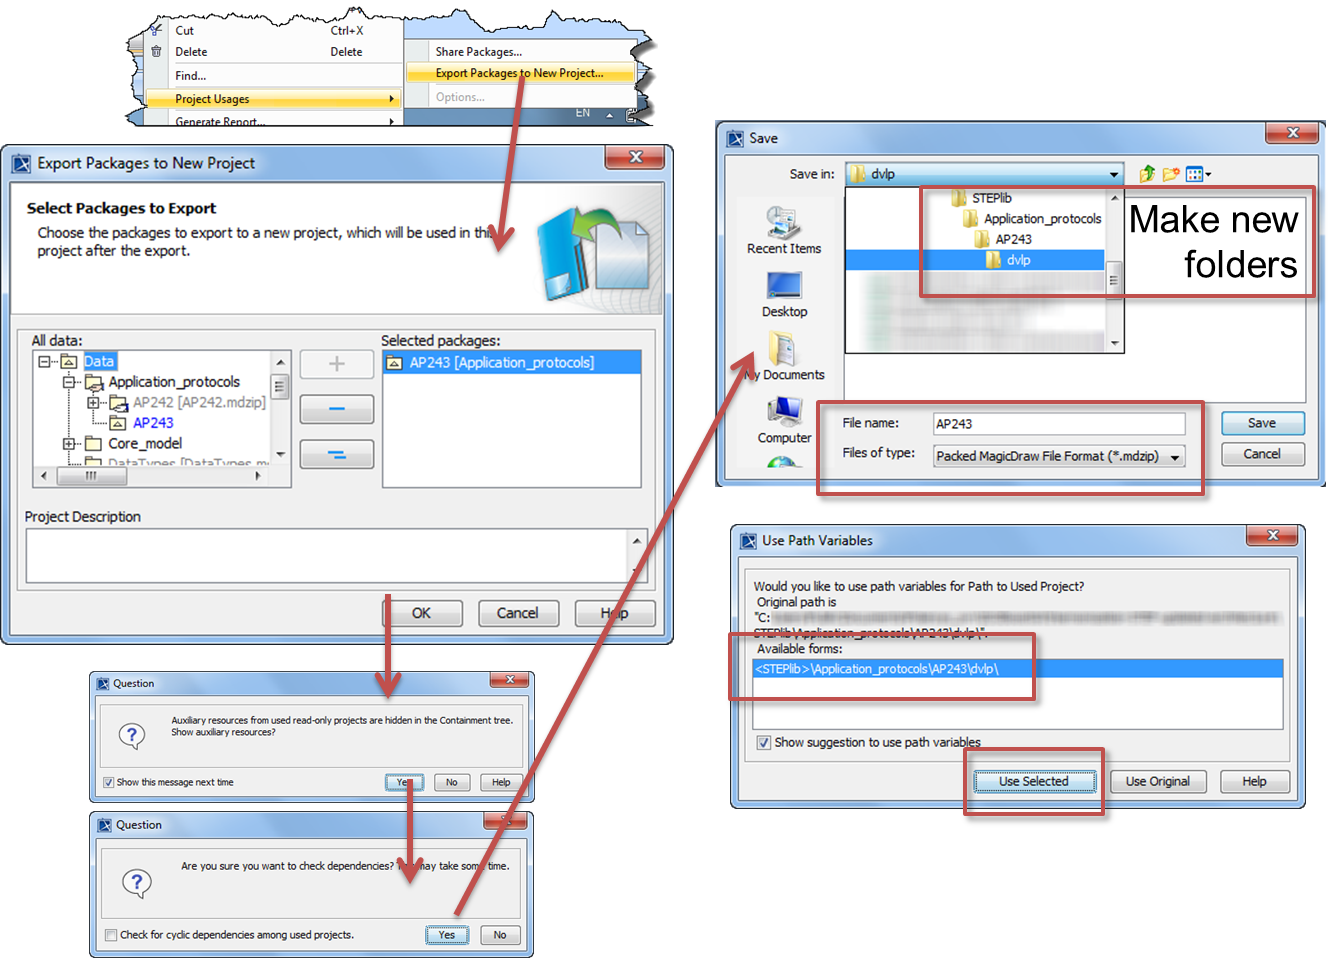
Figure 25 Export the model
Open the new ApplicationProtocol project (see Open readonly sub models)
- Add the Core model (and/or other needed models) by setting to Use Local Project
Select File > Use Project > Use Local Project
Select 1. Select project amd then From predefined location
Select the location or add a new location using the ”...” button
select the mdzip from STEPlib/Core_model/dvlp/Core_model.mdzip
- click Next (2. Specify usage options).
- Accessibility of Read-only should be used to prevent accidental editing
- Load Mode default is Always Load, change to improve performance if needed
Finish
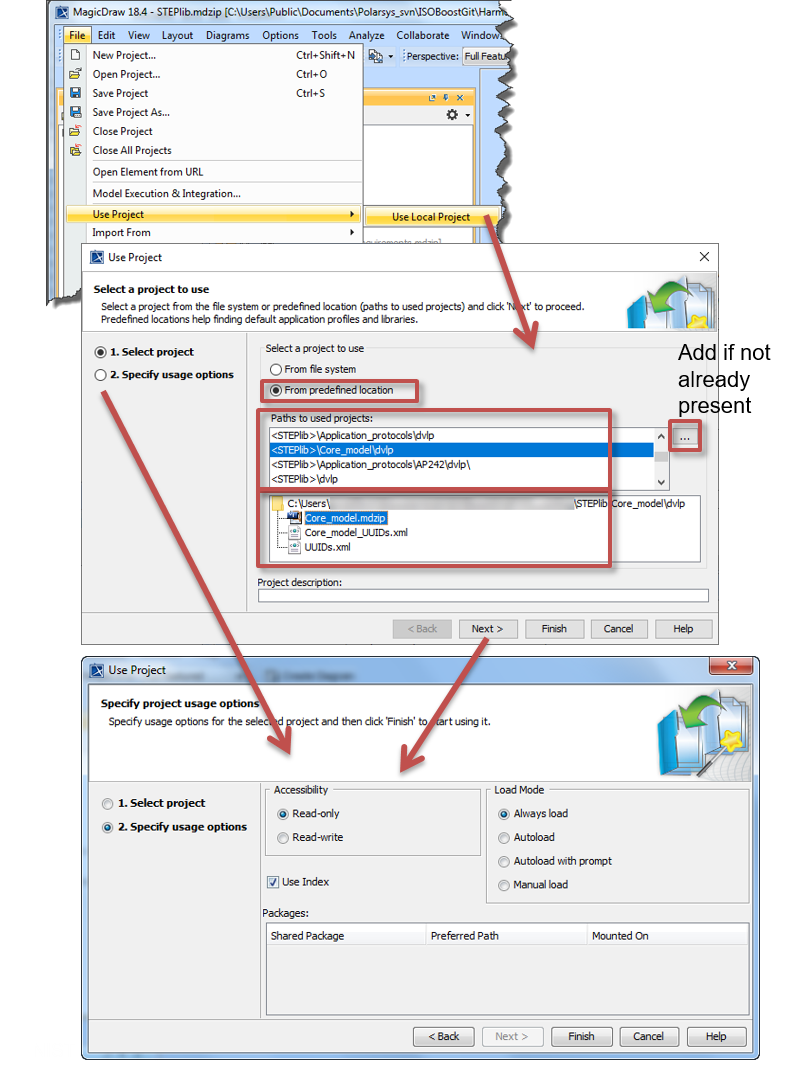
Figure 26 Export the model
Save all projects
Under the new Model (from step 2) create a new model called ActivityModel
Export to a separate project stored APxx/ActivityModel/dvlp/ and set to Use Local Project
Under the new Model (from step 2) create a new model called ConceptualModel
Export to a separate project stored APxx/ConceptualModel/dvlp/ and set to Use Local Project
Under the new Model (from step 2) create a new model called DomainModel
Export to a separate project stored APxx/DomainModel/dvlp/ and set to Use Local Project
On completion, the containment tree should be as shown in Figure 27 below:
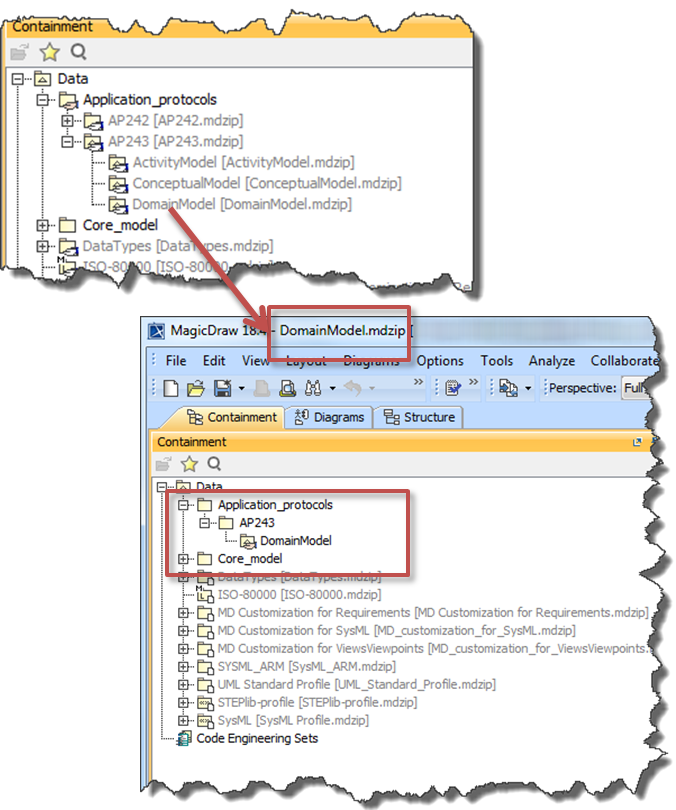
Figure 27 STEPLIB Model Structure – for AP
Todo
naming convention for package/files/etc
Create a new CTC in the Core model
Adding a new Core Technical Capability [CTC] to the Core Model in STEPlib uses the same process as described in Create a new Application Protocol (AP) above.

Figure 28 High level STEPLIB structure
Modularization to enable multi-file models
This is explained in Create a new Application Protocol (AP) (as steps 5-7) above.
Importing existing models into STEPlib
This section shows how to import an existing self contained MagicDraw project into the Domain Model. Importing into other areas and from other formats uses the same process.
The steps in the task are as follows:
- Open the project
- select File > Import and choose the appropriate format (MagicDraw will match and consolidate where appropriate)
- Tidy up, moving the imported content into the correct area of the STEPlib model
- Save
Adding an existing profile
The steps are:
- File > Use Project > Use Local Project
- Choose (default) Select project > From predefined location. Then select the existing path that starts with <STEPlib>, and select the file
- Specify usage options (default) Read-only and Always load
- The profile can then be seen in the containment tree.
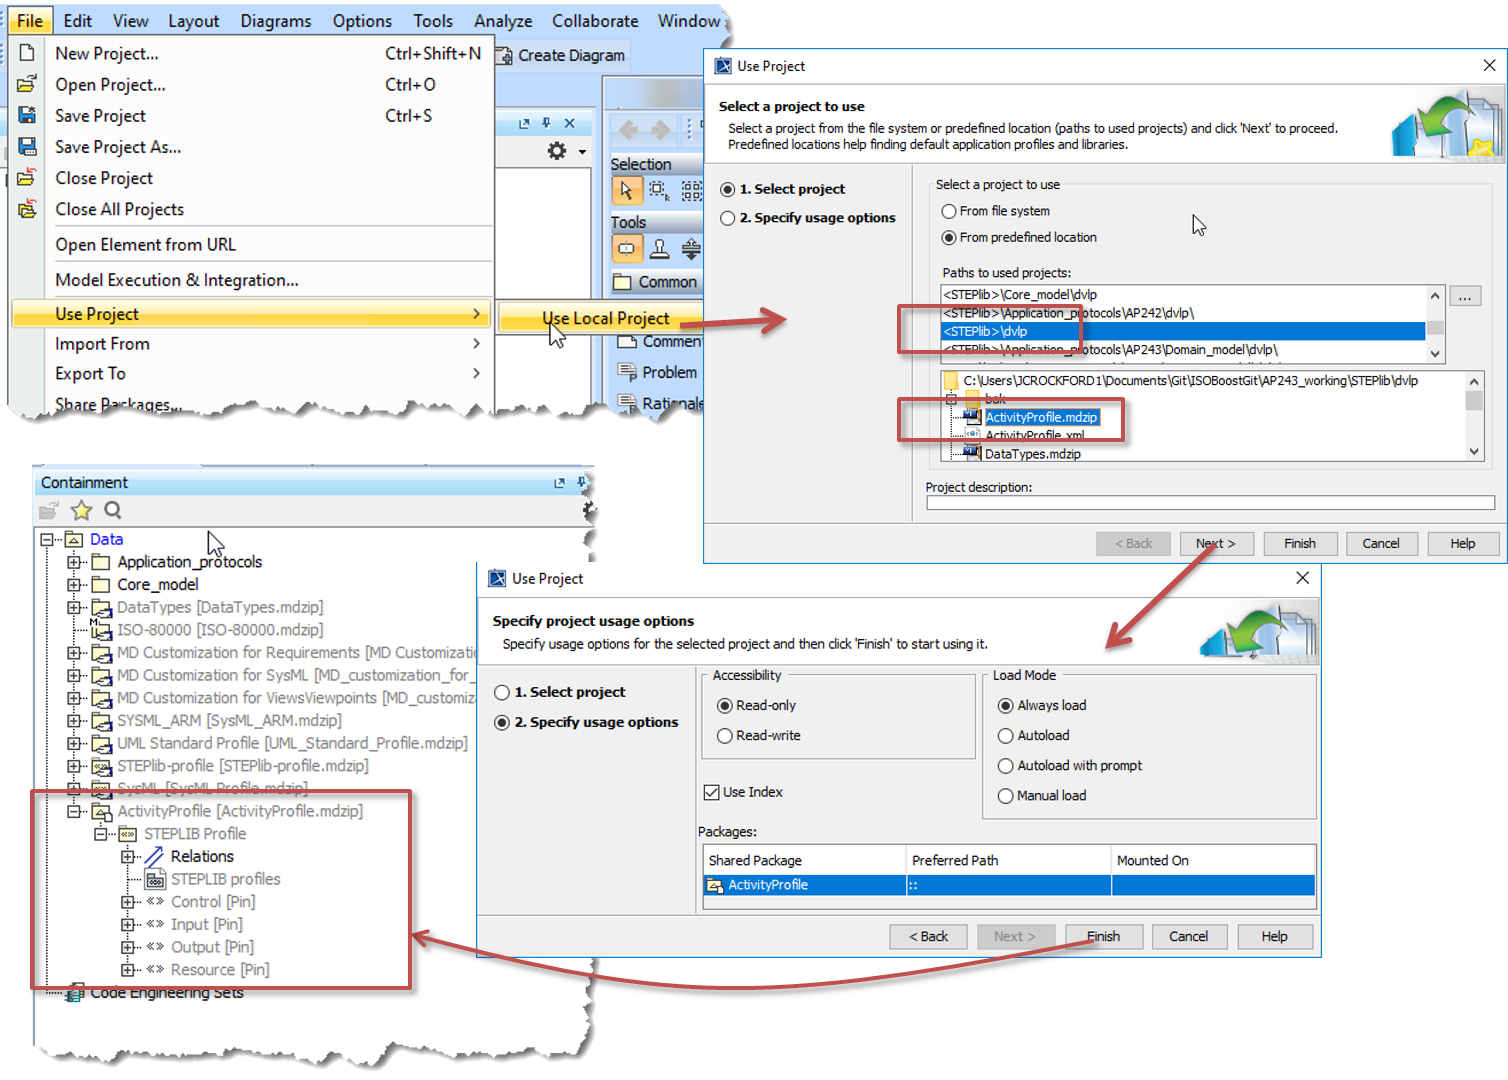
Figure 29 Steps to add an existing profile
Managing permissions
Todo
the rest of this section.
Todo
the rest of this page.
Section author: Judith Crockford (AP243)